
I’ve made it to the test print! …but let’s first pick up where we left 😌️
On day 3 I transferred the pattern tile to the vinyl plate that would become the stamp.
I first tried with my fancy transfer paper, which works great on hard surfaces, but I was not convinced by the result on the soft rubber 🤷♀️️
So I used the good old method of going over the lines on the transparent paper with a “fatter” pencil (2B is enough), applying the pencilled side to the vinyl, and rubbing/pressing slightly with the fingers (or a spoon or something) over the whole surface. This is enough to transfer the graphite to the soft surface!
Then I cut out the tile…
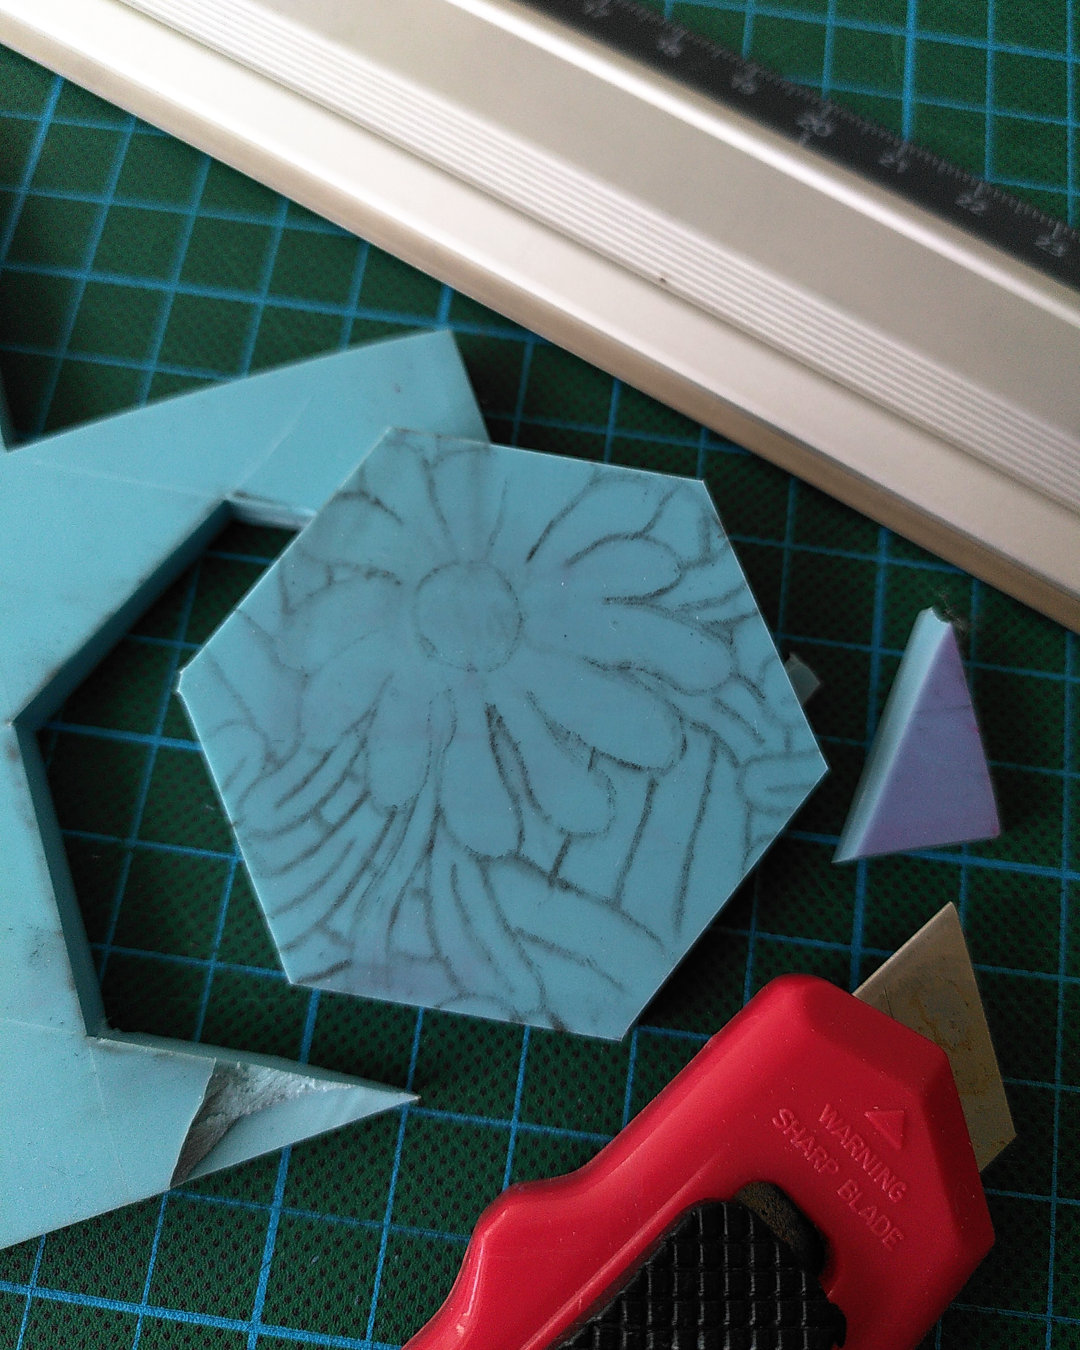
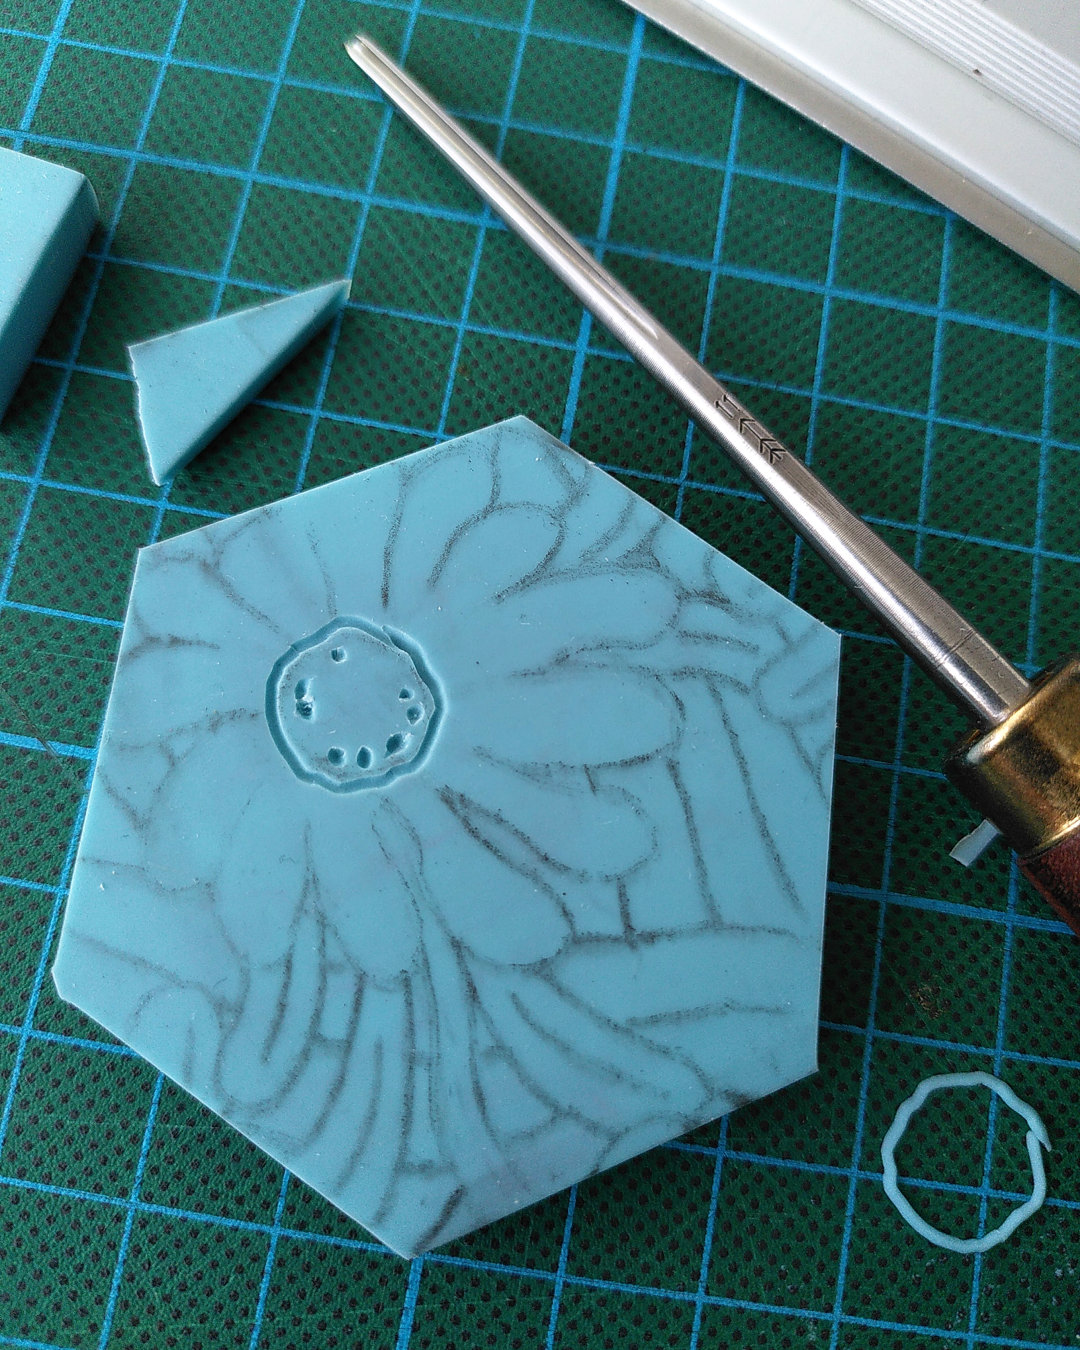
My time for the day was more or less up at that point (I’m doing this as part of a “30 minutes of drawing – in a broad sense – ‘without a goal’ every working day” project/habit I’m working on 😁️), but I wanted to at least start carving! So I got out the carving tools and cut a circle (look at that cute, neat little carved-out ring 😊️!) and a few dots :)
Day 4
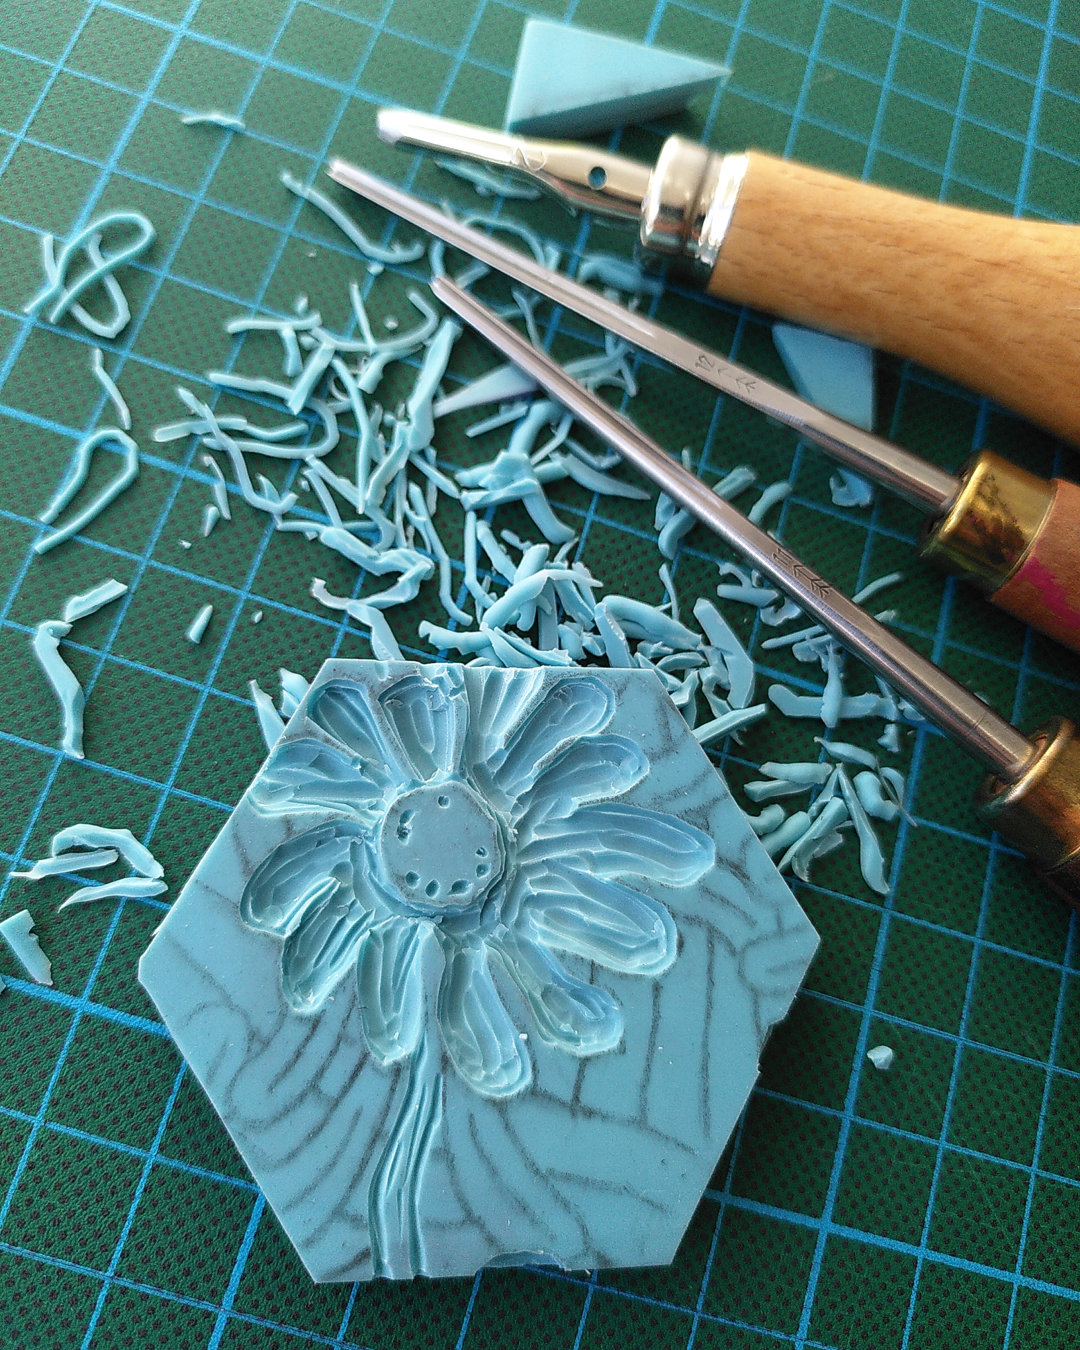
Carving day! Finished the petals and the stalk :)
Day 5
Now on to the details…
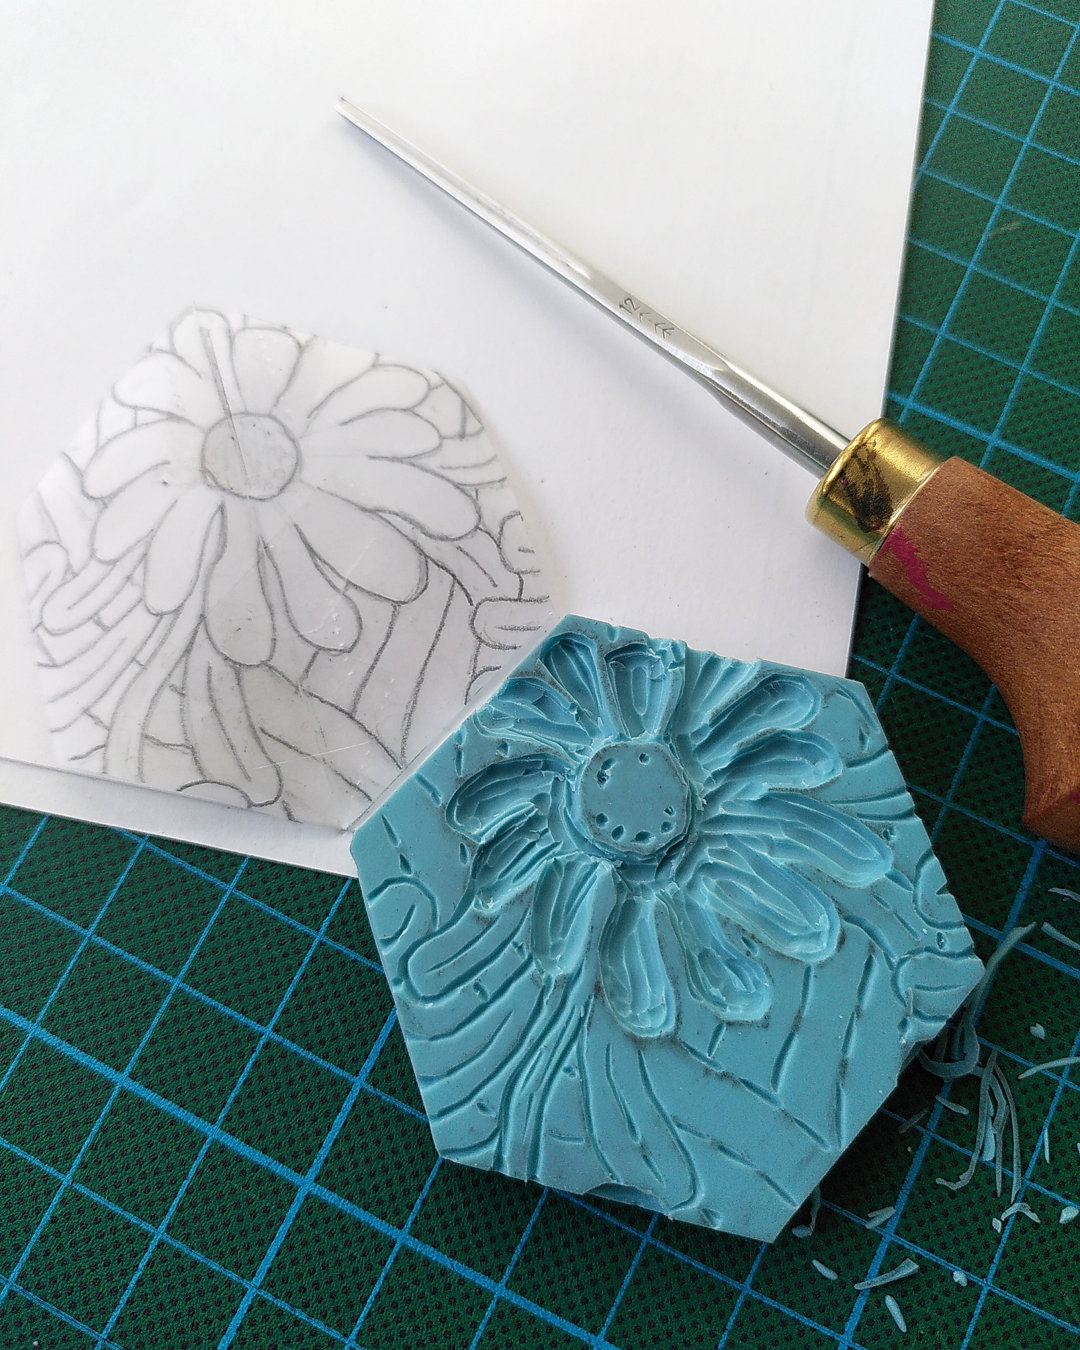
At the edges it was not always easy to identify what the lines belonged to – the flower petals, the leaves, or the curvy, abstract lines in the background (which I planned to be dashed lines). I used the transparent paper to help me see the continuity, but realised only quite late that I could use the back side, which is mirrored with respect to the end result, but the right way around for carving (as seen on the picture above)! So I spent quite some time turning it in my head, with not very good results 😅️.
Fortunately we’re not aiming for a perfectly polished result here, what I like about hand-made patterns is the imperfection 😊️… but I still want the motif to have some consistency 😁️. Once I had the transparent paper the right way around, I finished pretty quickly :)
I could have stopped there as I knew that if I start to print I would probably get over 30 minutes – but I really wanted to finally see how it looks like in print 😊️!
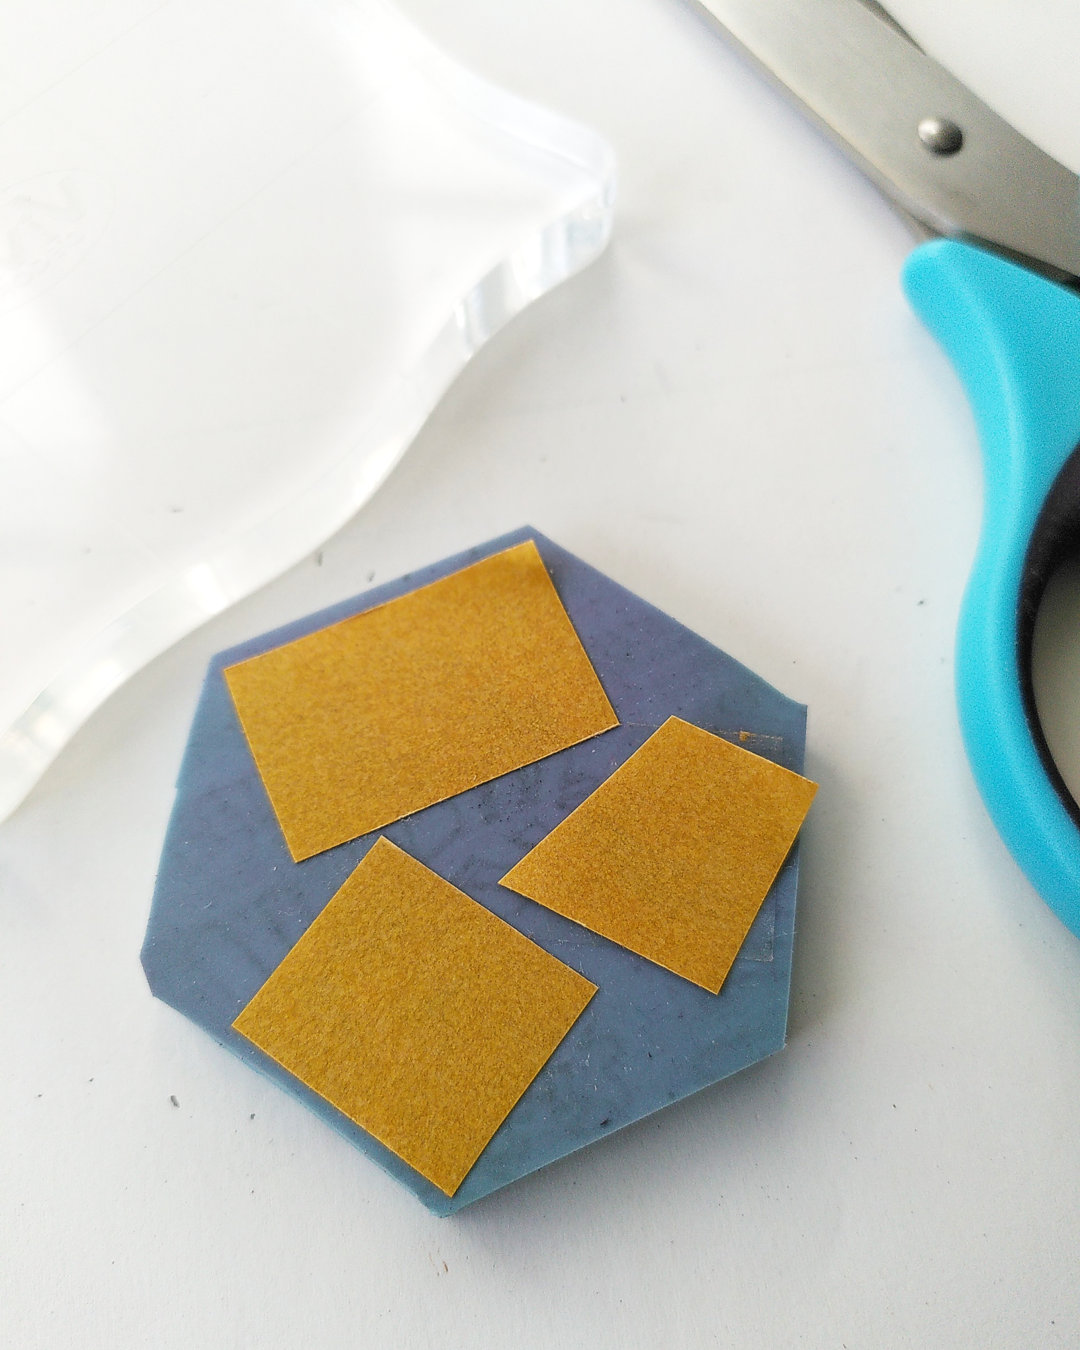
In order to press evenly I use an acrylic block (as it’s transparent you can see where you’re printing). I attach the stamp to it with double-sided tape. I try to distribute it evenly on the stamp, because even if it’s very thin, the pressure is still higher on the taped areas, and the rest may not get enough contact with the paper.
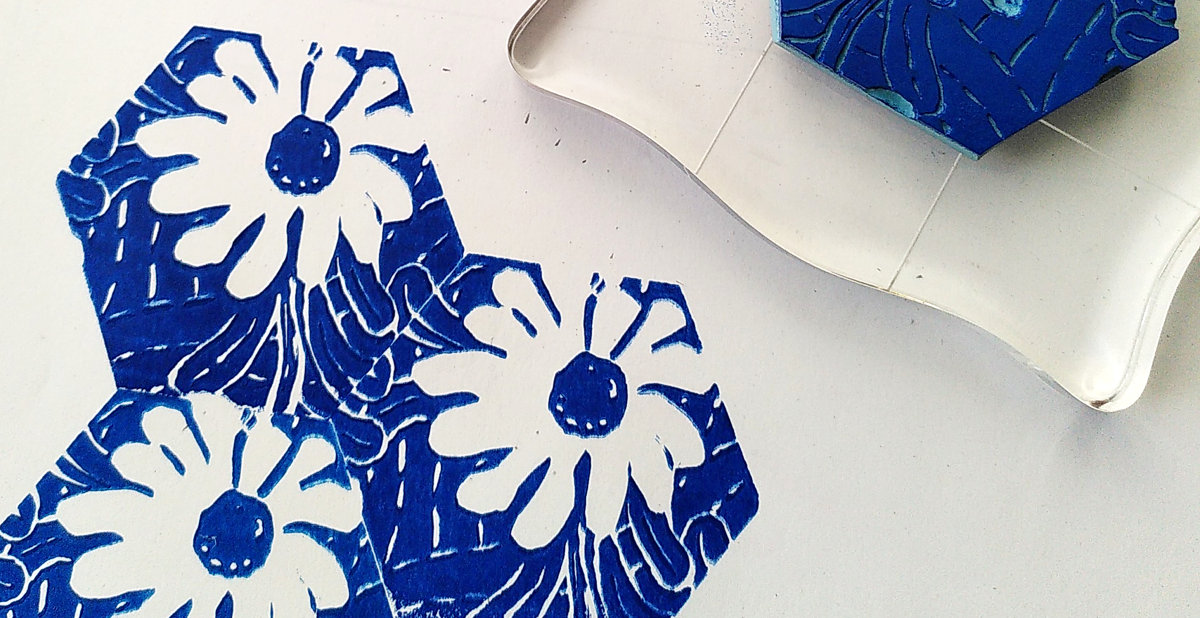
And here we are, the test print 😊️!

As you can see the bottom edge does still not print too well. I think it is because I carved at the edge of the vinyl block, which for some reason is often (always?) a bit thinner/tapered. So better not use the edges, even if it’s nice as a “really straight line” reference. I now remember already noticing this in the past… Now that I’ve written it down, hopefully I’ll remember it before carving next time 😅️.
I’m using water-based linoprint paint (from Schmincke). In this case I’ll be applying it with these little sponges you see on the top right of the picture below. You get a more consistent result with a roller (“brayer” in printing jargon), but here I want to mix colours directly on the stamp to vary the colour within the pattern, also within a single tile. I tried a bit on the bottom one, mixing cyan with the prussian blue, though it’s not very visible.
Here are 2 examples of what I mean, from my “100-day project” back in 2018 :) That was done with acrylic paint, but maybe simply because I didn’t have linoprint paint at the time. I think it worked well with the linoprint paint, which is good because I don’t want to use acrylic anymore as it’s plastic… (I also don’t want to use vinyl anymore, but shortly before I made that decision I had bought quite a stock of it, so I think I’d as well use it, rather than throwing it away – or keeping it unused in my cupboard 😌️)

We’ll see how the final print went in the next (and probably last) episode!
By the way, if you have any questions, do not hesitate to contact me! 😘️